
Synthetic data for solving an evil CAPTCHA
Written by
Chris Laan
automotive
February 1, 2020

Sample CAPTCHA
During the course of a project we encountered an image CAPTCHA while using a piece of software that we pay for. We needed to automate the software to run overnight and so could not manually fill in the CAPTCHAs every time. In general CAPTCHAs have many drawbacks, such as not being accessible for blind and vision-impaired users. They are also no longer considered very effective anyway.
We needed a solution quickly, ideally within a few hours of hacking. This seemed like a good use case for synthetic data & machine learning.
The obvious challenge in solving a CAPTCHA like this is coming up with a few thousand training images where we know the answer. Our approach was to use a graphics library to randomly generate as many images as we need that look similar enough to original CAPTCHA. Since we already know the characters used to generate our fake images, we can train our model to predict those answers.
I used the ImageDraw module from PIL to create similar images, here are a few samples:
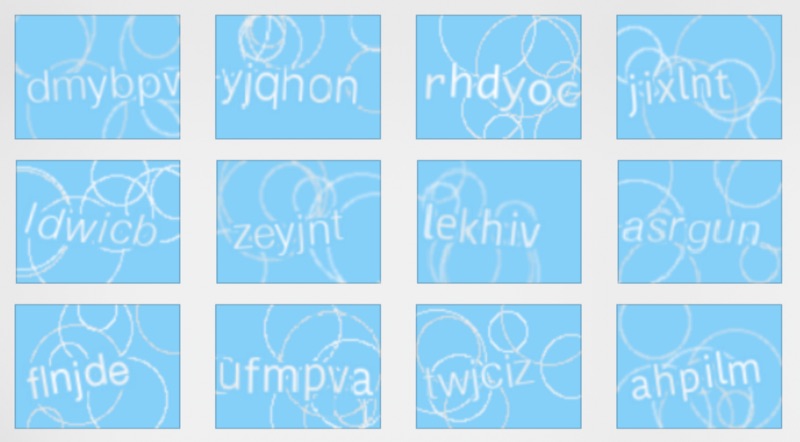
Artificial CAPTCHAs
It took some effort to get the randomness looking the same; and luckily the target CAPTCHA had a pretty limited set of characteristics. I chose a few random fonts, and drew assorted circles around the letters. The next issue is figuring out the model architecture and ground truth labels.
The simplest format we could for ground truth data would be to have the model spit out the full string of letters automatically. For example, if we know there will only ever be six letters, we could build the model to have six outputs with one-hot encoded letters. Alternatively you could use some sort of recurrent structure to output a sequence of letters. I chose to go a different route since I wasn't sure having discrete outputs per letter would work well enough, and the RNN approach seemed a bit out of reach for one afternoon of work.
I decided to break the task up into two stages, the first stage would perform semantic segmentation to separate the letters from the noisy background, and the second would perform character recognition on each individual letter.
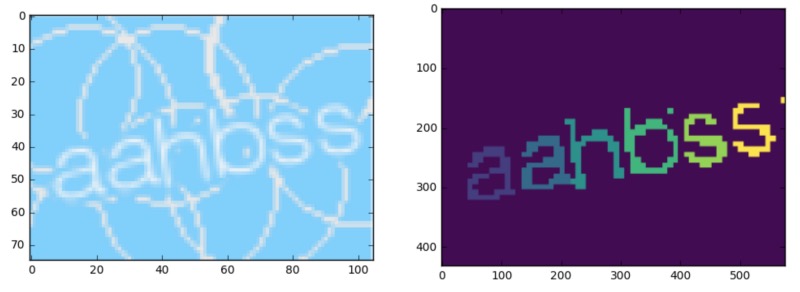
Since the CAPTCHA has 6 letters, I trained an off the shelf semantic segmentation network with 7 categories (background, and characters 1 through 6) on around 20,000 artificial images.
Here is a sample image along with the segmentation masks for training. Each letter has its own label.
Sample CAPTCHA with training masks
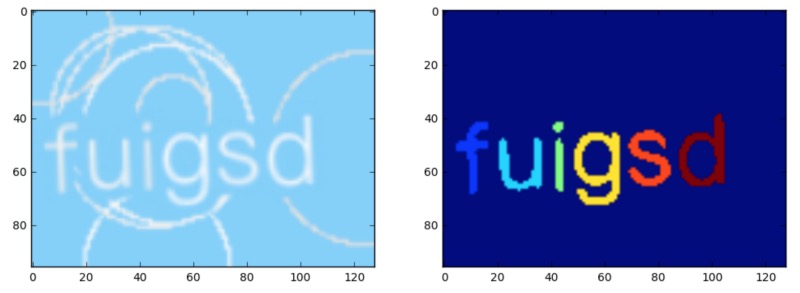
For the network, I used the nice repo here: github.com/divamgupta/image-segmentation-keras which contains a simple training API and many sample network architectures to choose from. After only a few minutes of training, the results were looking pretty good. Here is the network output on the original image above:
Network prediction output
The output from stage one allows us to get a separate pixel mask for each letter. With this mask we can process each letter one by one rather than trying to solve the entire image at once. For this stage, I chose a very simple keras architecture that was slightly modified from this article: medium.com/@ageitgey/how-to-break-a-captcha-system-in-15-minutes-with-machine-learning
It's pretty simple:
# Build the neural network!
model = keras.Sequential()

# First convolutional layer with max pooling
model.add(Conv2D(32, (5, 5), padding="same", input_shape=(32, 32, 2), activation="relu"))
model.add(MaxPooling2D(pool_size=(2, 2), strides=(2, 2)))

# Second convolutional layer with max pooling
model.add(Conv2D(50, (5, 5), padding="same", activation="relu"))
model.add(MaxPooling2D(pool_size=(2, 2), strides=(2, 2)))

# Hidden layer with 500 nodes
model.add(Flatten())
model.add(Dense(500, activation="relu"))

# Output layer for 26 characters
model.add(Dense(26, activation="softmax"))

# Ask Keras to build the TensorFlow model behind the scenes
model.compile(loss="categorical_crossentropy", optimizer="adam", metrics=["accuracy"])
To train this network I ran my original training data through my trained stage 1 network to produce crops of single letters along with the mask that my stage 1 network would produce. By giving the stage 2 network both the mask, along with the cropped grayscale image of the letter, I hoped to make the job of predicting the letter easier than using just the letter image alone.
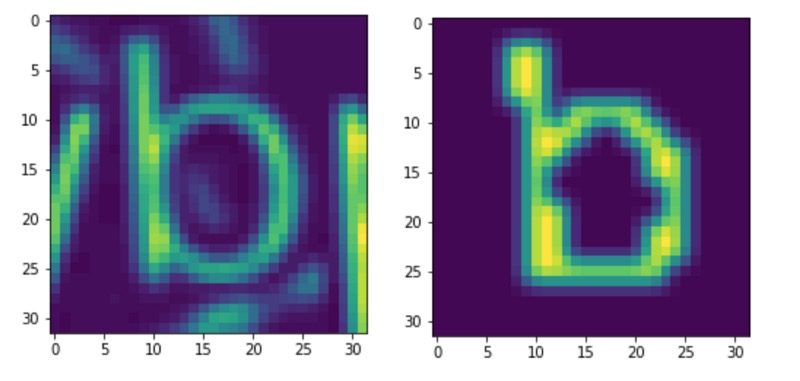
Grayscale crop and mask output from Stage 1
The input to the network is (32,32,2) - the two input channels correspond to the original image crop and the stage 1 output mask for a single letter.
Putting these two together we can just loop through each letter and classify it. Surprisingly the network worked pretty well. The network doesn't need to be 100% accurate either; if it fails we can just try again until it works (assuming no limits on retries)
Get the markdown source for offline reading